

tuner04civic's k swap- f&ck it, more photos and updates
Well the time has finally come for me to start building up a k motor and putting it into my em2.
parts i have so far:
-02 k20a2 motor and transmission
-rsx-s sub frame
-Mishimoto radiator and fan
-Hybrid-Racing wiring conversion
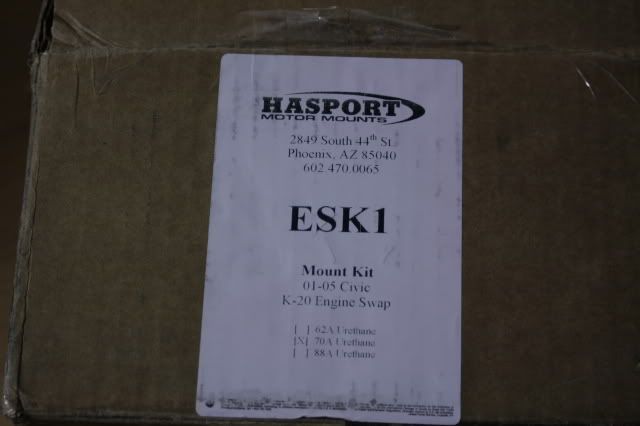
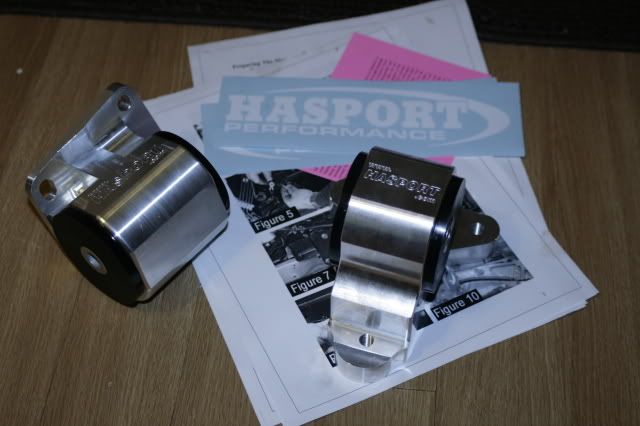
-Hasport motor mounts (ordered)
-Hybrid-Racing fuel rail
-Aeromotive fuel pressure regulator
-Aeromotive fuel filter
-Buddy Club racing header
-Buddy Club short shifter
-dc5 shift knob
-dc5 valve cover
-gasket kit oem
-A ton of Honda oem screws, rings, etc
-92-95 civic p/s tank
-92-95 civic throttle cable
-ep3 pedals
-rsx-s clutch master cylinder
still to come...a lot of parts
11-14-08
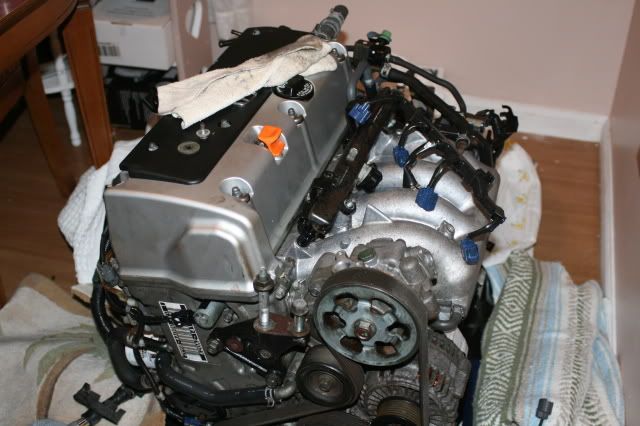
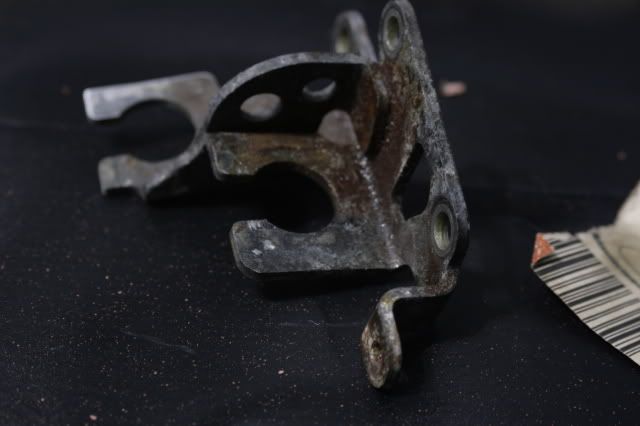
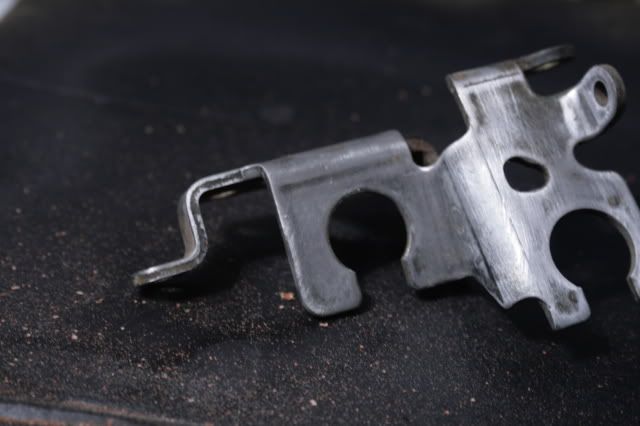
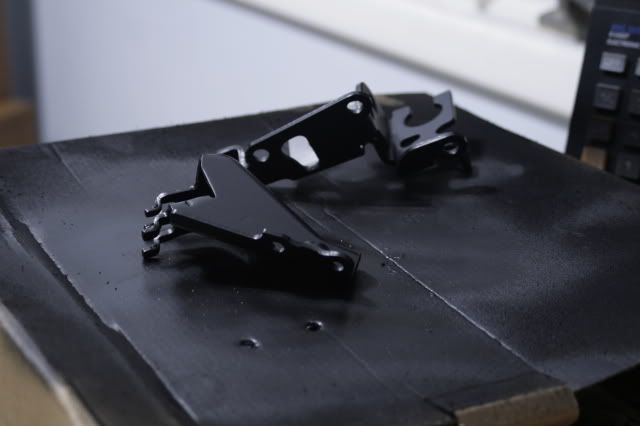
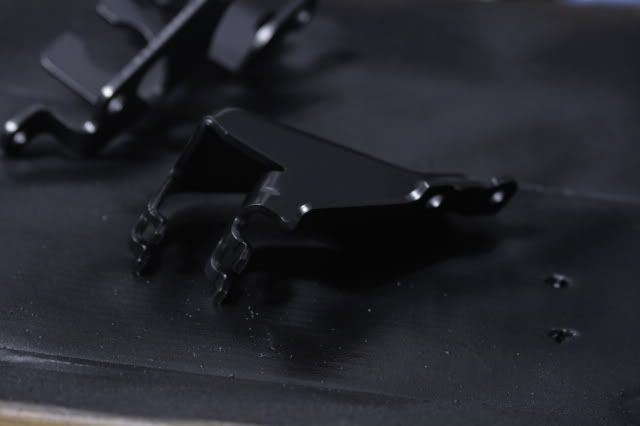
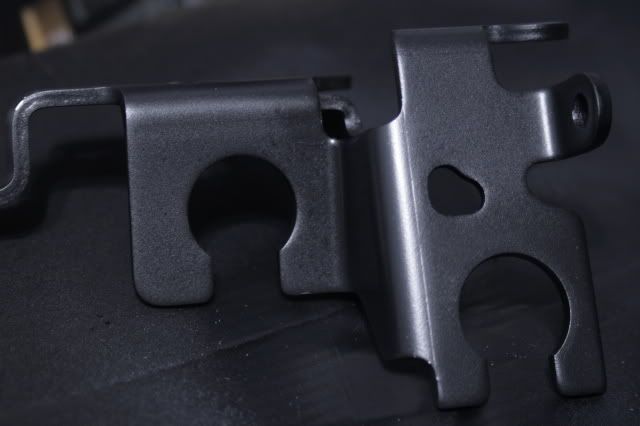
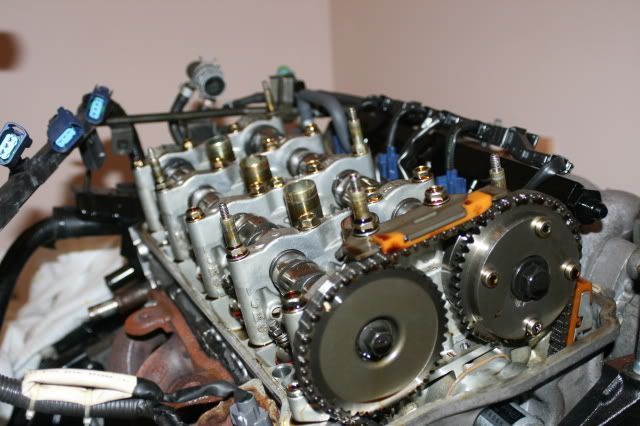
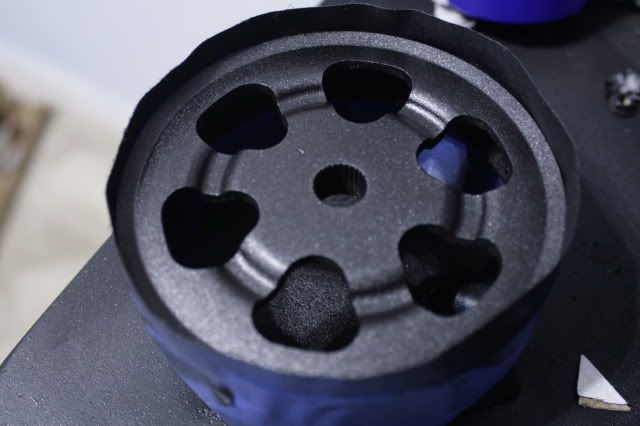
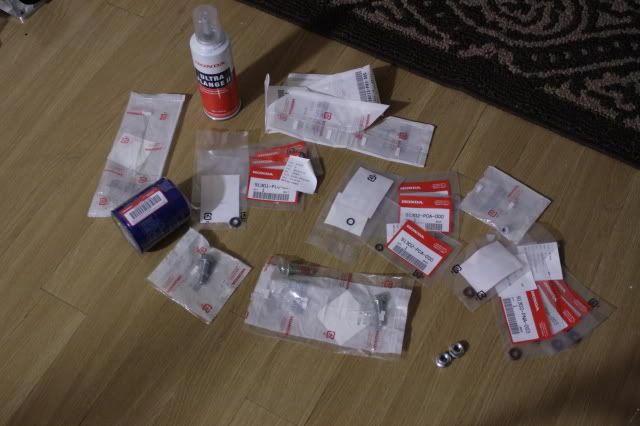
as of now i have received my motor. After getting some help from some friends (including eddiechaps off this site) to help me move this motor into my house, I started to clean up the motor(2 key words to anyone trying this without a motor lift...."moving men" they work... really they do). I ordered some oem pieces from Acura and i'm waiting on a few more parts to continue the build. As of now i took some of the brackets (throttle cable and shifter cables) and restored them to a much cleaner condition than they were originally in.
![Image]()
![Image]()
![Image]()
![Image]()
![Image]()
![Image]()
![Image]()
Before sanding
![Image]()
after sanding
![Image]()
after some heat resistant paint (stain black)
![Image]()
![Image]()
![Image]()
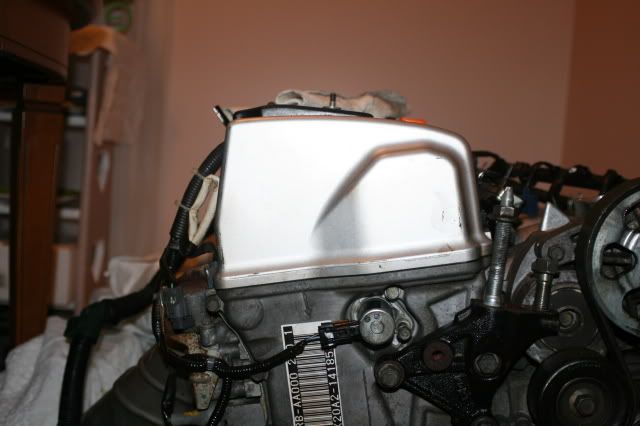
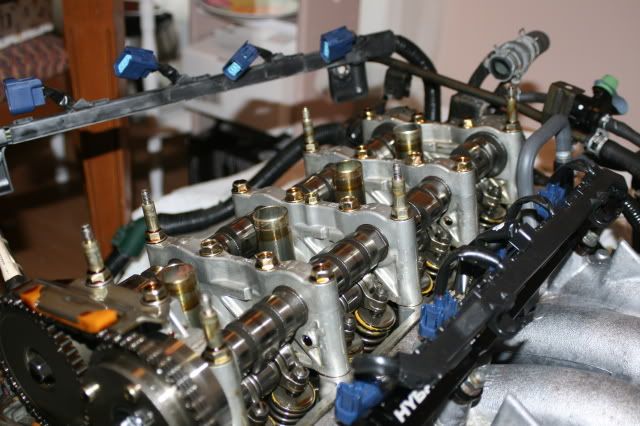
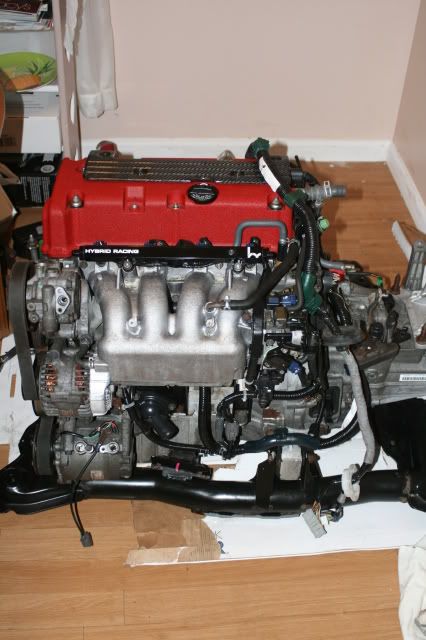
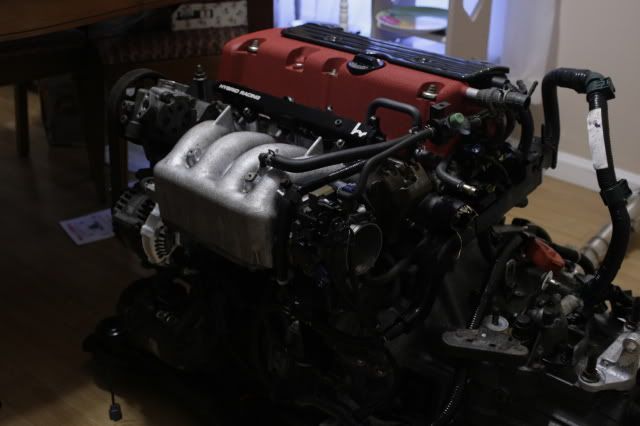
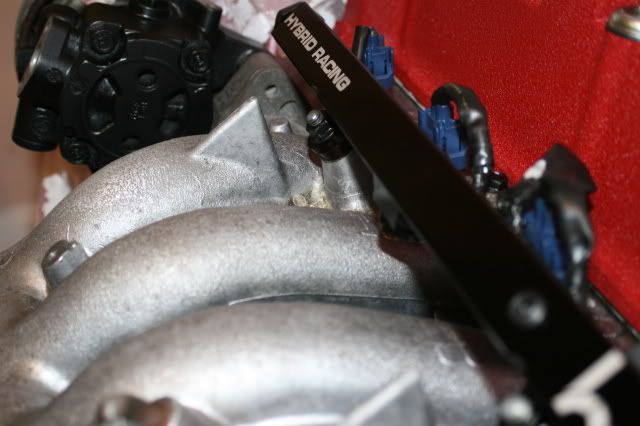
I also did a test fit with the fuel rail, header, and valve cover. im waiting an some o rings for the injectors to change and some Honda ultra flange 2 to finish them up.
![Image]()
![Image]()
![Image]()
![Image]()
![Image]()
![Image]()
more to come in the upcoming days!
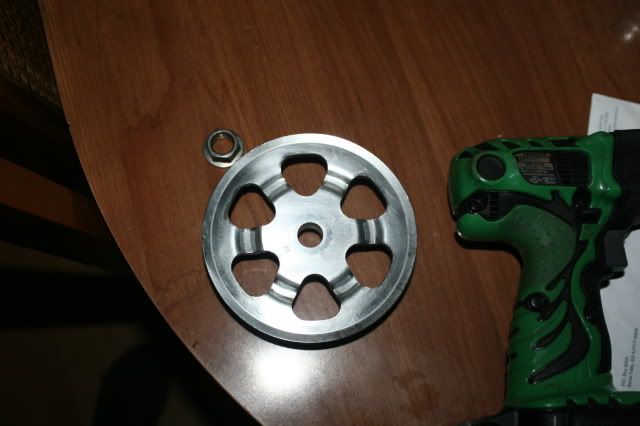
update 11-15-08
Today the power steering pulley got cleaned up from the shitty condition it was in before. to do this i used some lemons and a Brillo pad. Then i reinstalled and also removed the serpentine belt and tomorrow ill be getting new plugs, belt and some other accessories from the store.
![Image]()
![Image]()
![Image]()
![Image]()
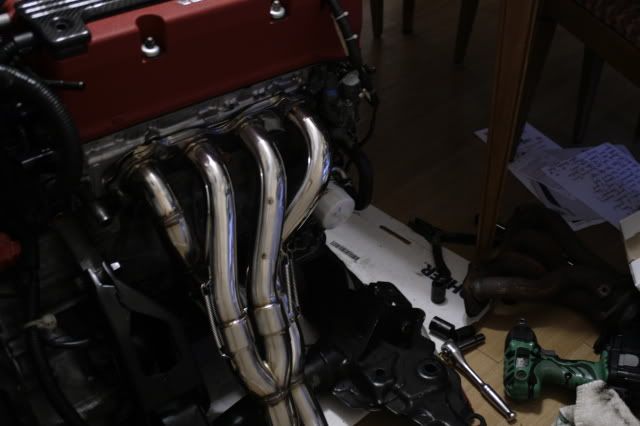
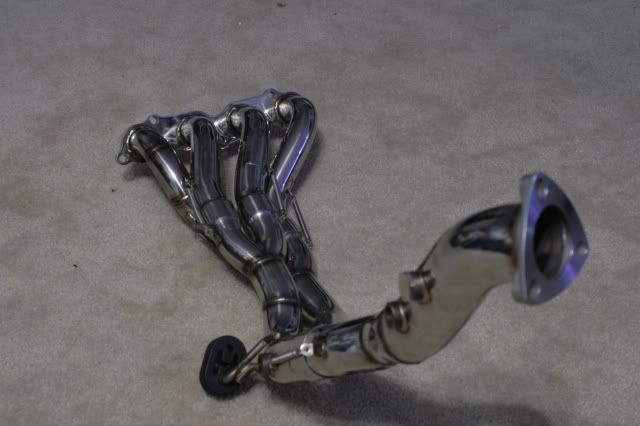
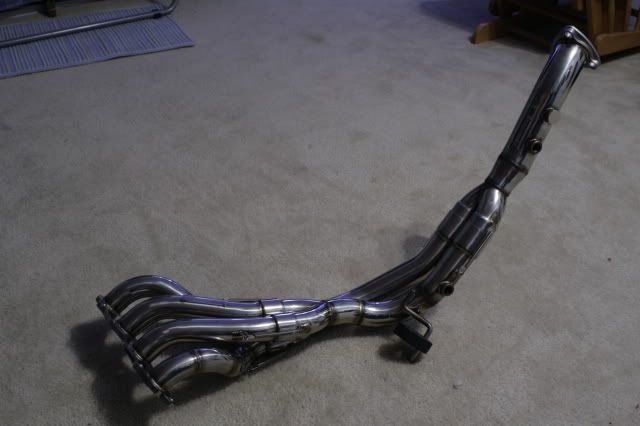
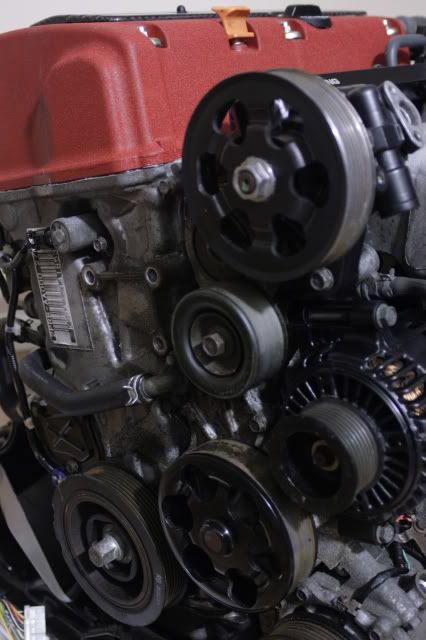
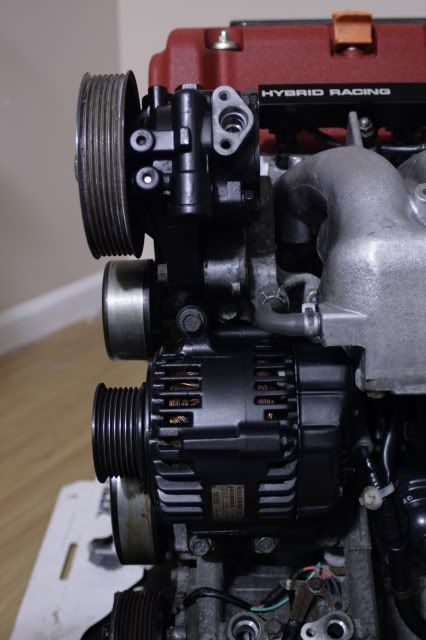
and here are some better shots of the header for people who were interested.
![Image]()
![Image]()
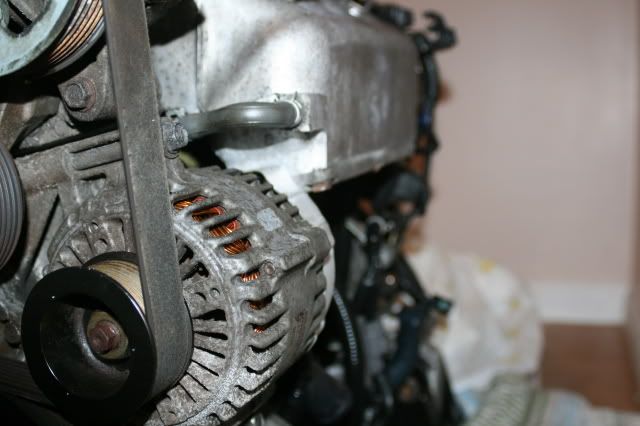
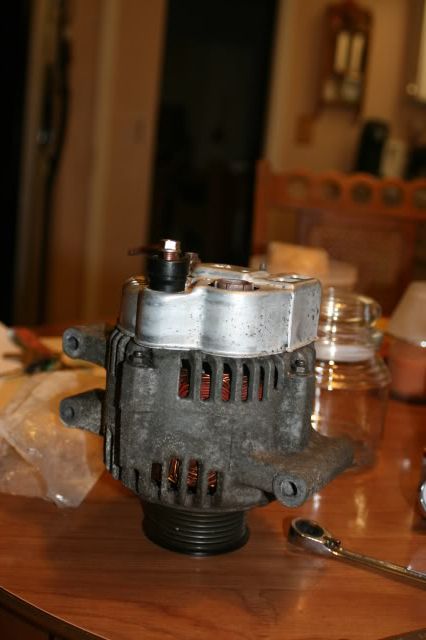
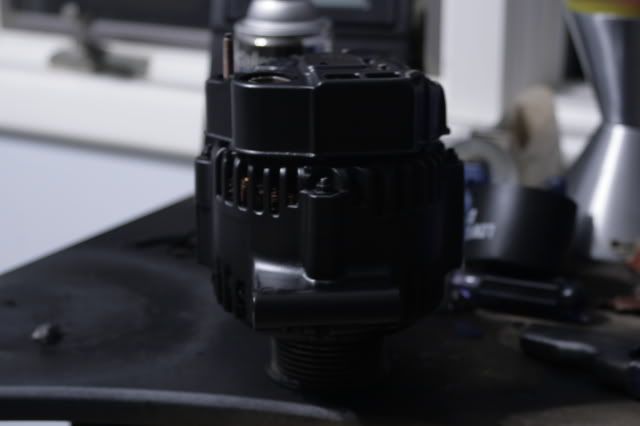
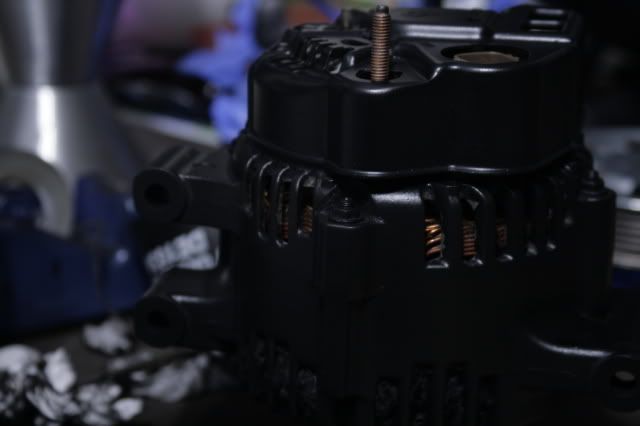
ok today i removed the alternator and begun to clean out the pieces on it. after cleaning it up i added a fresh coat of heat resistant paint. i ended up ripping up some paper towel pieces and filled in the vent holes to stop the coils from being painted. then removed them by using a tiny screw driver. now only thing left is to have it tested to make sure it works tomorrow. i will also be picking up new serpentine belt, spark plugs, and my parts from Acura.
![Image]()
![Image]()
![Image]()
![Image]()
![Image]()
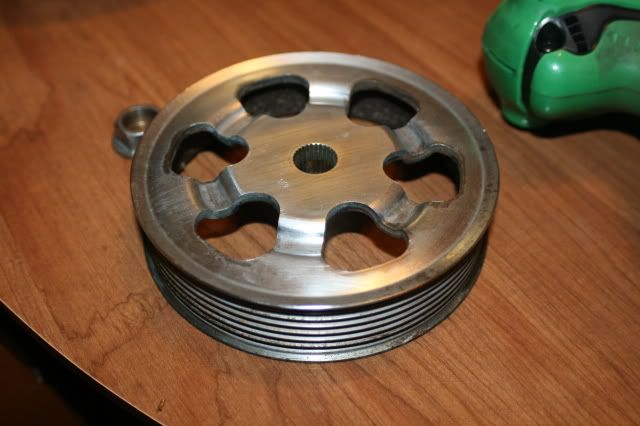
So i just went and painted the power steering pulley. i didnt like the overall look so i did a base coat of the flat black and then added some very light coat of some paint in magnesium metallic.
![Image]()
![Image]()
![Image]()
update 11-21-08
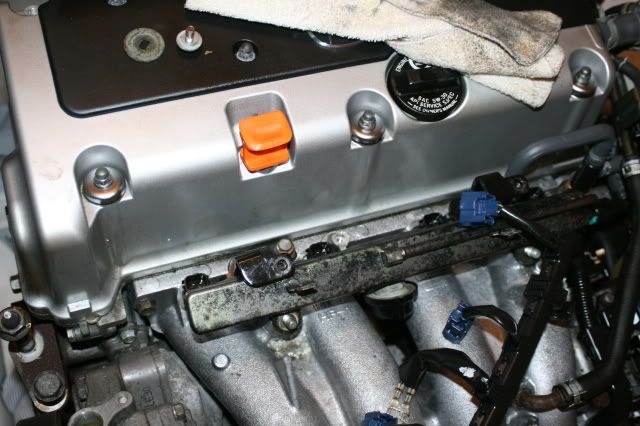
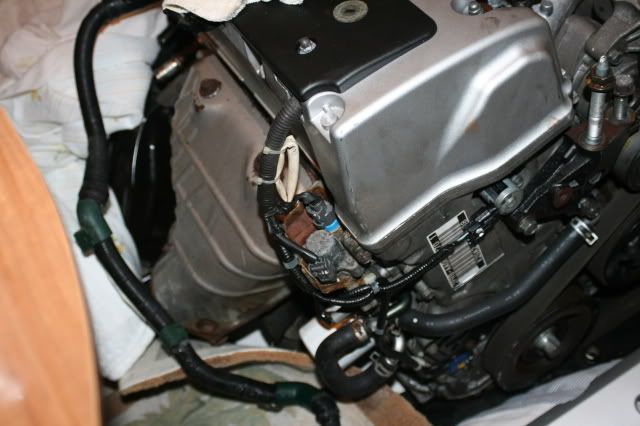
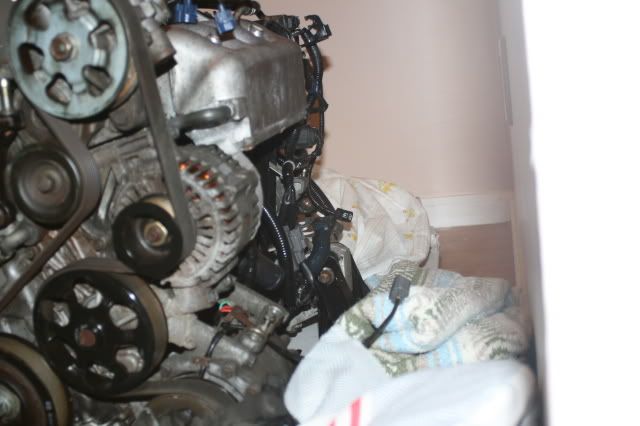
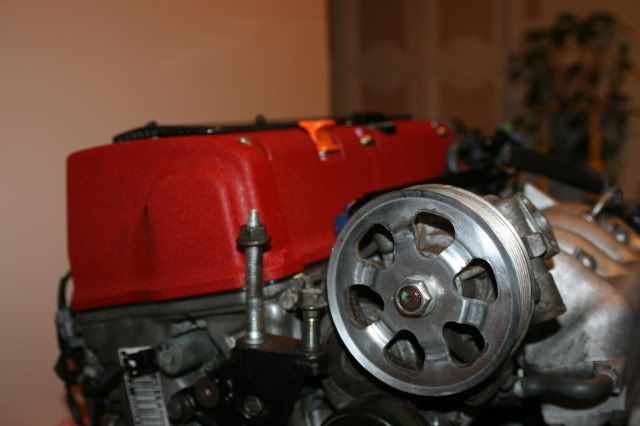
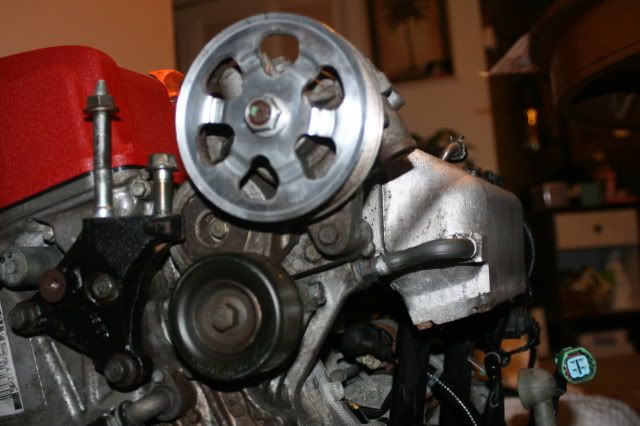
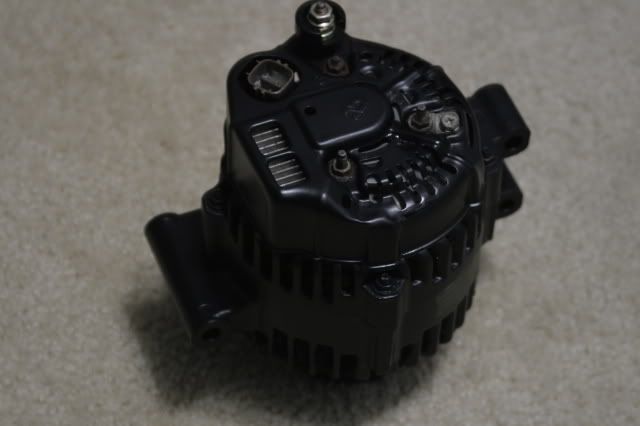
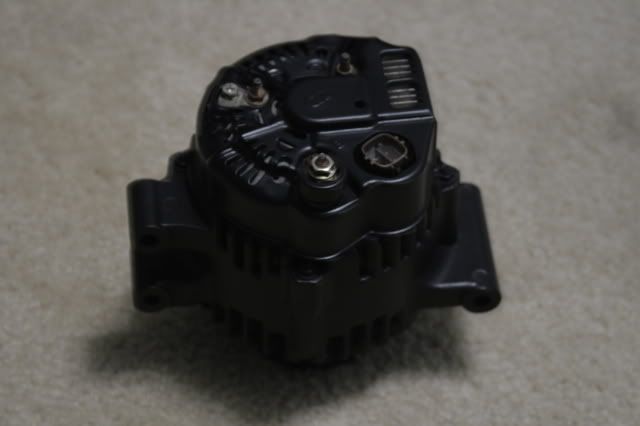
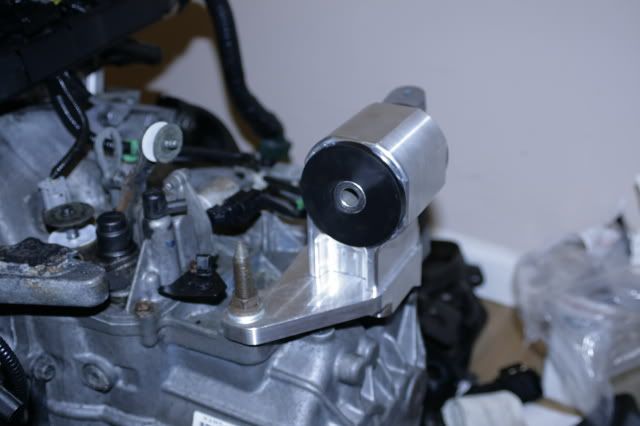
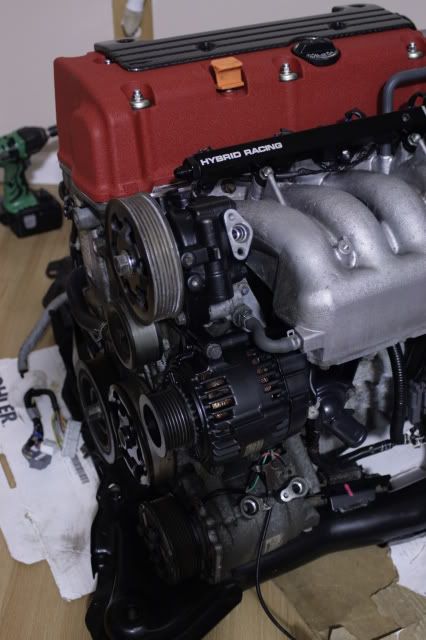
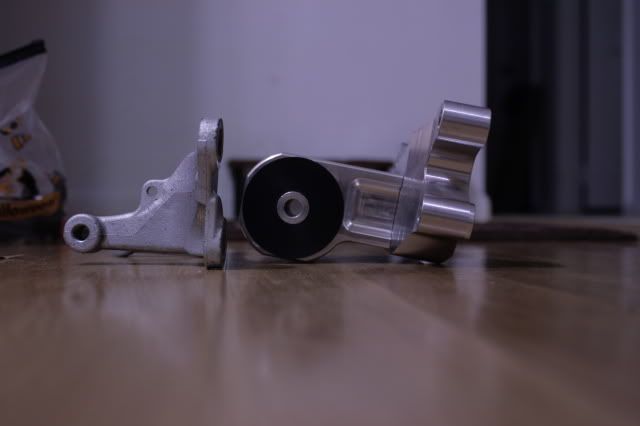
today i went over to my acura dealer to pick up all the parts that i ordered. mostly nuts, bolts, o rings, oil filter, and ultra flange sealer. Shocking when i got home my hasport motor mounts came in so i had a fun day of fitting and working on the motor. I added the ultra flange to the valve cover gasket to ensure a proper fit and no leaks. then did the spark plug change to NGK laser iridium. I installed the power steering pump which i had painted black a few days prior and installed the alternator. Using the Haynes manual i got he proper torque specs for the bolts. then finally i re installed the carbon top piece with the bolts i painted flat black to ensure a cleaner look. so tomorrow i have a few more small things to do mostly with the o rings on the injectors and installing a new belt but its just about good to be dropped in. all i need a few minor things to have this ready to drop in.
![Image]()
![Image]()
![Image]()
![Image]()
![Image]()
![Image]()
![Image]()
![Image]()
![Image]()
![Image]()
![Image]()
*****update*****11-22-08
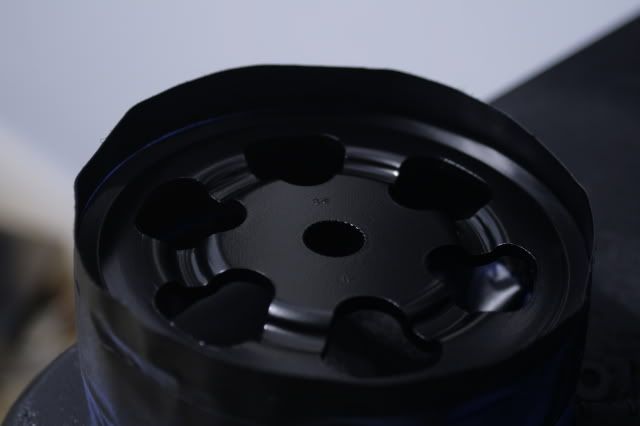
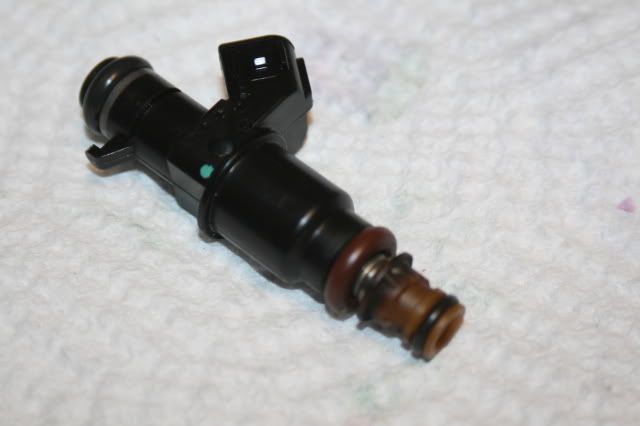
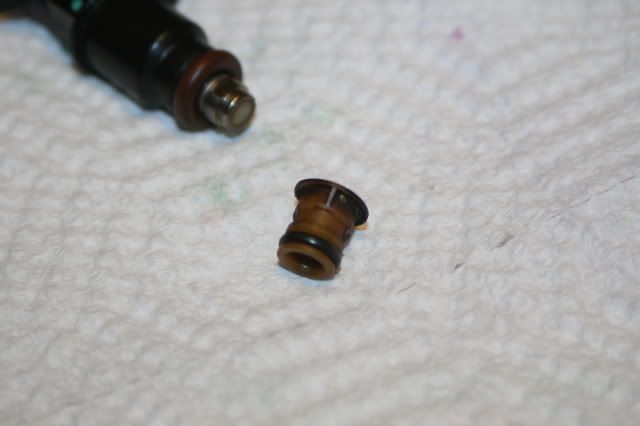
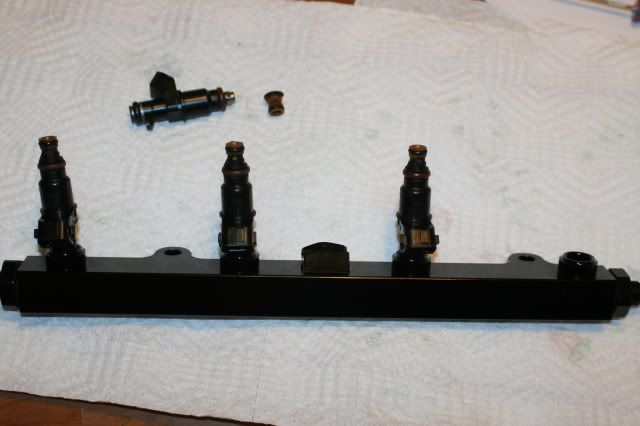
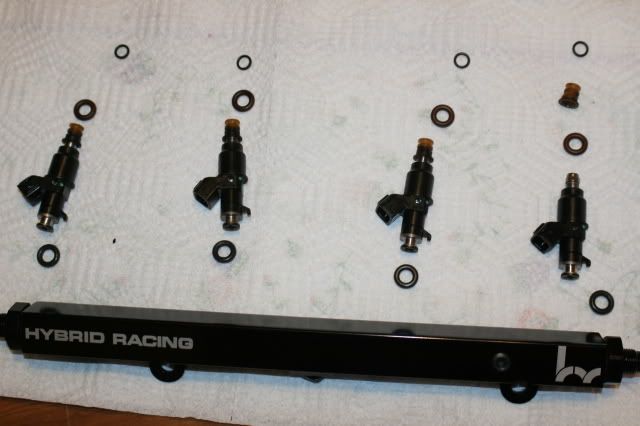
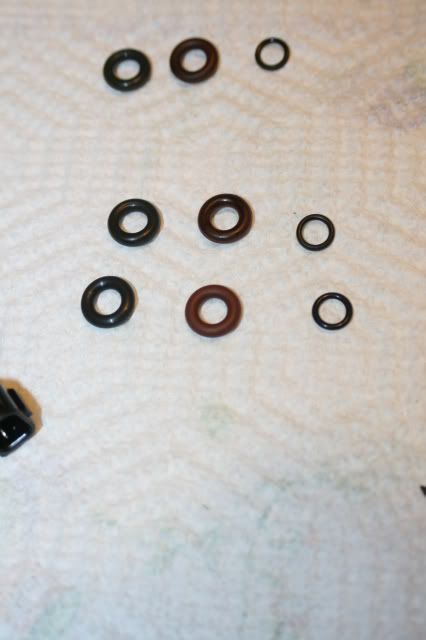
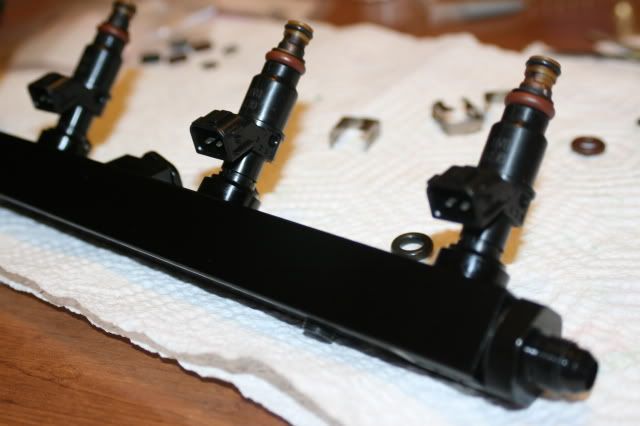
ok so today i took a little time to finally finish the fuel injectors. whenever you remove the injectors its always recommended to replace all the o rings to ensure no leaks later on. So i took apart the fuel rail and injectors,then put on the new o rings. you can tell in one of the shots how dirty the o rings really were with build up which turned it nearly black. Now to reinstall i just slid the o rings on and didnt really have any problems on sliding the injectors abck on. With the removal i did encounter one issue of the injector sprayer cap being stuck in the intake manifold and i made a slight crack in it trying to remove it from the manifold. After that i painted the rail nuts and tightened it all together. so now one more piece down. t minus 2 weeks for the swap!!!
![Image]()
![Image]()
![Image]()
![Image]()
![Image]()
![Image]()
![Image]()
![Image]()
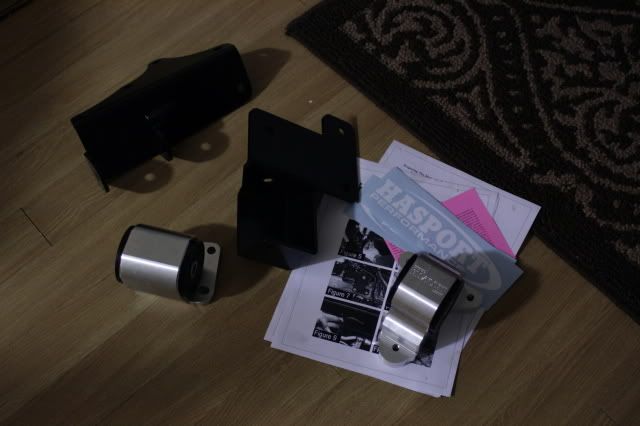
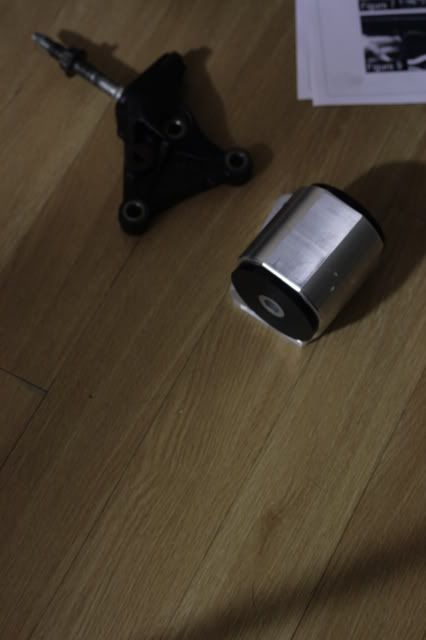
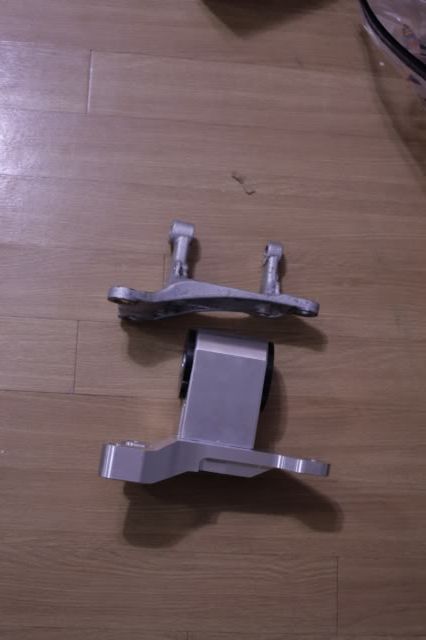
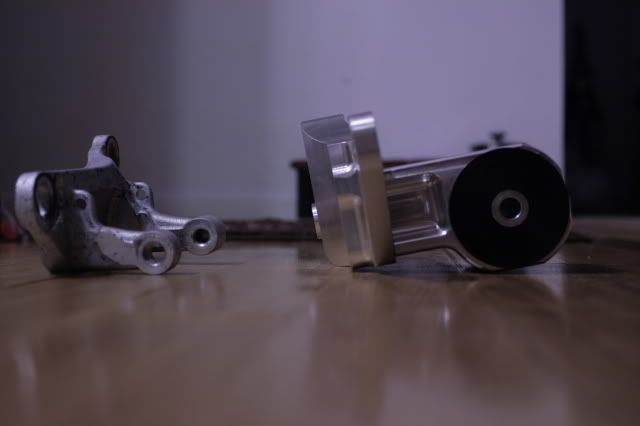
i also added shots of the transmission motor mount which is heavier and larger in size than the OEM piece it replaces.
![Image]()
![Image]()
![Image]()
haha ok. i was going to upload last night but dozed off early.
Well summit came in time and dropped off all my fuel fittings and lines i needed as well as corsport the other day with my wideband and shifter bushings. I also got in my slave cylinder and the guy threw in another clutch master cylinder al wired up already. saved me the time so i just bolted that up to the motor.
yesterday i sorta got anxious and went off on stripping the interior and front bumper and headlights. Then i went and removed the auto shifter and put in the buddy club short shifter which fits in perfect, not problems at all.
and a special thanks to pete who saved my ass and dropped off his motor lift for me to use and make this much easier than having some people lift the motor by hand. which i will never do again and eddie can agree with me on that scenerio, lol.
Today i got the hood off, took out the battery, removed my b/c voltage stabilizer, intake, all ground wires, battery plate, and a few other things here and there. next up is draining the fluids.
Well the time has finally come for me to start building up a k motor and putting it into my em2.
parts i have so far:
-02 k20a2 motor and transmission
-rsx-s sub frame
-Mishimoto radiator and fan
-Hybrid-Racing wiring conversion
-Hasport motor mounts (ordered)
-Hybrid-Racing fuel rail
-Aeromotive fuel pressure regulator
-Aeromotive fuel filter
-Buddy Club racing header
-Buddy Club short shifter
-dc5 shift knob
-dc5 valve cover
-gasket kit oem
-A ton of Honda oem screws, rings, etc
-92-95 civic p/s tank
-92-95 civic throttle cable
-ep3 pedals
-rsx-s clutch master cylinder
still to come...a lot of parts
11-14-08
as of now i have received my motor. After getting some help from some friends (including eddiechaps off this site) to help me move this motor into my house, I started to clean up the motor(2 key words to anyone trying this without a motor lift...."moving men" they work... really they do). I ordered some oem pieces from Acura and i'm waiting on a few more parts to continue the build. As of now i took some of the brackets (throttle cable and shifter cables) and restored them to a much cleaner condition than they were originally in.

Before sanding
after sanding
after some heat resistant paint (stain black)
I also did a test fit with the fuel rail, header, and valve cover. im waiting an some o rings for the injectors to change and some Honda ultra flange 2 to finish them up.

more to come in the upcoming days!
update 11-15-08
Today the power steering pulley got cleaned up from the shitty condition it was in before. to do this i used some lemons and a Brillo pad. Then i reinstalled and also removed the serpentine belt and tomorrow ill be getting new plugs, belt and some other accessories from the store.
and here are some better shots of the header for people who were interested.
ok today i removed the alternator and begun to clean out the pieces on it. after cleaning it up i added a fresh coat of heat resistant paint. i ended up ripping up some paper towel pieces and filled in the vent holes to stop the coils from being painted. then removed them by using a tiny screw driver. now only thing left is to have it tested to make sure it works tomorrow. i will also be picking up new serpentine belt, spark plugs, and my parts from Acura.
So i just went and painted the power steering pulley. i didnt like the overall look so i did a base coat of the flat black and then added some very light coat of some paint in magnesium metallic.

update 11-21-08
today i went over to my acura dealer to pick up all the parts that i ordered. mostly nuts, bolts, o rings, oil filter, and ultra flange sealer. Shocking when i got home my hasport motor mounts came in so i had a fun day of fitting and working on the motor. I added the ultra flange to the valve cover gasket to ensure a proper fit and no leaks. then did the spark plug change to NGK laser iridium. I installed the power steering pump which i had painted black a few days prior and installed the alternator. Using the Haynes manual i got he proper torque specs for the bolts. then finally i re installed the carbon top piece with the bolts i painted flat black to ensure a cleaner look. so tomorrow i have a few more small things to do mostly with the o rings on the injectors and installing a new belt but its just about good to be dropped in. all i need a few minor things to have this ready to drop in.

*****update*****11-22-08
ok so today i took a little time to finally finish the fuel injectors. whenever you remove the injectors its always recommended to replace all the o rings to ensure no leaks later on. So i took apart the fuel rail and injectors,then put on the new o rings. you can tell in one of the shots how dirty the o rings really were with build up which turned it nearly black. Now to reinstall i just slid the o rings on and didnt really have any problems on sliding the injectors abck on. With the removal i did encounter one issue of the injector sprayer cap being stuck in the intake manifold and i made a slight crack in it trying to remove it from the manifold. After that i painted the rail nuts and tightened it all together. so now one more piece down. t minus 2 weeks for the swap!!!

i also added shots of the transmission motor mount which is heavier and larger in size than the OEM piece it replaces.
haha ok. i was going to upload last night but dozed off early.
Well summit came in time and dropped off all my fuel fittings and lines i needed as well as corsport the other day with my wideband and shifter bushings. I also got in my slave cylinder and the guy threw in another clutch master cylinder al wired up already. saved me the time so i just bolted that up to the motor.
yesterday i sorta got anxious and went off on stripping the interior and front bumper and headlights. Then i went and removed the auto shifter and put in the buddy club short shifter which fits in perfect, not problems at all.
and a special thanks to pete who saved my ass and dropped off his motor lift for me to use and make this much easier than having some people lift the motor by hand. which i will never do again and eddie can agree with me on that scenerio, lol.
Today i got the hood off, took out the battery, removed my b/c voltage stabilizer, intake, all ground wires, battery plate, and a few other things here and there. next up is draining the fluids.


